Every primary shotgun in Helldivers 2 has a job. This guide ranks the Punisher, Slugger, Halt, Cookout, Sweeper, Double Freedom, M90A, Breakers, and energy-based shotguns according to their real combat roles rather than forcing them into a traditional tier list.
- Overview
- Shotgun Roles at a Glance
- How Shotguns Work in Helldivers 2
- SG-8 Punisher
- SG-8S Slugger
- SG-20 Halt
- SG-451 Cookout
- SG-97 Sweeper
- DBS-2 Double Freedom
- M90A Shotgun
- SG-225 Breaker
- SG-225SP Breaker Spray & Pray
- SG-225IE Breaker Incendiary
- SG-8P Punisher Plasma
- ARC-12 Blitzer
- LAS-13 Trident
- Final Thoughts
Overview
Traditional S-, A-, B-, and C-tier lists are often terrible at explaining how weapons actually work in Helldivers 2.
A weapon can be extremely powerful at one job while being inefficient at another. That does not necessarily make it better or worse than another weapon—it means the weapons occupy different combat roles.
For this breakdown, I evaluate shotguns according to four roles:
- Chaff Killer: Efficiently eliminates large numbers of smaller enemies.
- Elite Killer: Quickly focuses down more dangerous light- and medium-armored enemies.
- Crowd Control: Uses stagger, stun, pushback, confusion, or similar effects to restrict enemy movement and protect the team.
- Utility: Provides capabilities such as demolition, suppression, stealth support, or attacks against structures and enemy spawners.
A weapon’s primary role is the job it performs most naturally and efficiently. Secondary and tertiary roles indicate useful overlap, but they should not distract from the weapon’s main purpose.
No weapon should be evaluated in a vacuum. Your primary weapon is only one component of a complete loadout containing a secondary weapon, throwable, support weapon, armor passive, and stratagems.
The goal is not to identify one shotgun that invalidates everything else. The goal is to understand what each shotgun does well so you can choose the right tool for your preferred playstyle and the rest of your equipment.
Shotgun Roles at a Glance
Chaff Killers
- SG-8 Punisher
- SG-225SP Breaker Spray & Pray
- SG-225IE Breaker Incendiary
- LAS-13 Trident
Elite Killers
- SG-8S Slugger
- SG-97 Sweeper
- DBS-2 Double Freedom
- M90A Shotgun
- SG-225 Breaker
Crowd-Control Weapons
- SG-20 Halt
- SG-451 Cookout
- SG-8P Punisher Plasma
- ARC-12 Blitzer
How Shotguns Work in Helldivers 2
Most shotguns perform their best work inside approximately 25 meters.
That is their natural close- and short-range environment:
- Close range: Within 15 meters
- Short range: Within 25 meters
- Mid range: Approximately 25–50 meters
- Long range: Beyond 50 meters
Some shotguns can still deal damage, ignite enemies, or apply stagger beyond 25 meters. However, pellet spread, projectile drag, damage falloff, and target size usually make those shots less reliable and less efficient.
That loss of efficiency directly affects your ammo economy.
A weapon generally receives the best value from its armor penetration when attacking armor equal to its penetration level or one step below it. When you use a medium-penetration weapon against completely unarmored enemies, for example, you are paying for penetration that the target did not require.
That does not mean the weapon suddenly stops working. It means another weapon with a damage profile designed for weaker targets may accomplish the same job with less ammunition or a larger total combat load.
Shotguns also vary substantially in how they deliver their damage:
- Punisher-style shotguns generally combine high damage with strong stagger and round-by-round tube reloads.
- Breaker-style shotguns trade most of that stagger for greater rates of fire and high damage output.
- Hybrid shotguns such as the Sweeper and Double Freedom combine shotgun mechanics with unusual firing or reloading systems.
- Energy-based shotguns use plasma, electricity, or laser beams and frequently behave differently from conventional ballistic shotguns.
The result is a weapon category with far more internal variety than a simple tier list suggests.
SG-8 Punisher
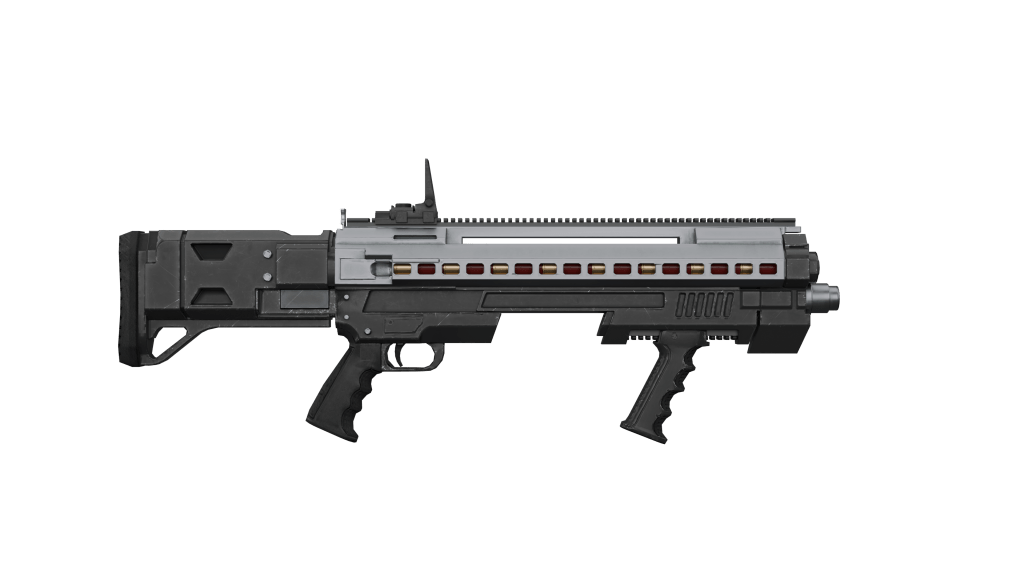
Primary role: Chaff Killer
Secondary role: Crowd Control
Tertiary role: Elite Killer
Best range: Approximately 5–25 meters
The SG-8 Punisher is the first shotgun most players unlock, but it should not be dismissed as a disposable starter weapon.
It is one of the most dependable close-range Chaff Killers in the game.
The Punisher fires 11 pellets for approximately 405 total damage per shot. It has a 16-round tube, fires at approximately 80 rounds per minute, and applies 35 stagger force—the highest stagger value currently available on a primary weapon.
That creates a simple but extremely reliable combat loop:
- Fire at a target.
- Kill smaller enemies outright.
- Heavily stagger anything that survives.
- Move, reposition, and fire again.
- Reload individual shells whenever the pressure briefly subsides.
The Punisher is particularly efficient against chaff because it can consistently kill smaller enemies while preserving ammunition through its round-by-round reload. You never need to discard the ammunition remaining in the tube just because you want to reload.
Against larger enemies, the Punisher’s stagger becomes an important secondary strength. Anything it can damage can generally be staggered, allowing you to interrupt attacks, create breathing room, or protect an ally.
Its effectiveness against elites depends heavily on range and target anatomy.
Against Terminids, enemies such as Warriors, Brood Commanders, Alpha Commanders, and Stalkers present relatively large targets. The Punisher can concentrate enough pellets into their heads or bodies to deal effective damage, particularly inside 15 meters.
Against Automatons and Illuminate units, elite weak points are often smaller. Devastator and Overseer heads are much harder to hit consistently with an entire pellet spread. Outside approximately 5–10 meters, you begin gambling on pellet distribution or spending excessive ammunition on body shots.
As a general rule:
- Use the Punisher at 15–25 meters for steady chaff removal.
- Close to approximately 5–15 meters when attempting to burst down elites.
- Use its stagger to maintain spacing rather than standing still and trading damage.
The Punisher’s muzzle attachments also allow you to modify its spread:
- Half choke: Reduces spread by approximately 25%.
- Full choke: Reduces spread by approximately 50%.
- Duckbill: Creates a wider horizontal pattern.
A tighter choke helps concentrate damage against individual targets, while the duckbill can improve horizontal coverage against groups.
The Punisher is not the fastest shotgun in the category, but it is sustainable, forgiving, and extremely consistent. It rewards disciplined movement and target selection more than reckless damage dumping.
SG-8S Slugger
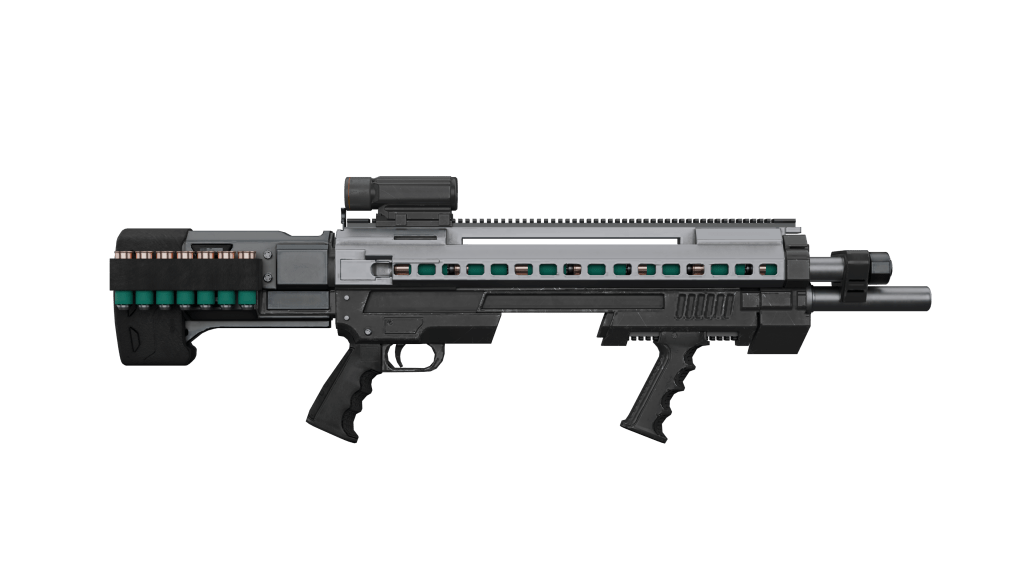
Primary role: Elite Killer
Secondary role: Crowd Control
Tertiary role: Chaff Killer
Best range: Approximately 5–25 meters
The SG-8S Slugger replaces the Punisher’s pellet spread with a single medium-penetration slug.
That fundamentally changes its job.
The Slugger deals approximately 330 damage per shot, has a 16-round tube, and applies 30 stagger force. Its single projectile makes it far more precise than a conventional shotgun, while its medium armor penetration allows it to damage targets that resist the standard Punisher.
Some players compare the Slugger directly to precision weapons such as the R-6 Deadeye and conclude that the Slugger is simply an inferior marksman rifle. That comparison ignores the Slugger’s intended combat environment.
The Deadeye is better suited to controlled engagements at mid-to-long range. The Slugger is a close-range brawling weapon.
Compared with the Deadeye, the Slugger offers:
- Twice the loaded capacity, with 16 rounds instead of eight.
- A faster round-by-round reload.
- Strong sustainability during close-range fights.
- Heavy stagger against most light- and medium-armored enemies.
- Enough body-shot damage to remain useful when perfect precision is not possible.
The Slugger performs best inside approximately 15 meters but remains effective throughout short range.
Against Terminids, it can kill Warriors with one accurate headshot. Larger enemies such as Hive Guards, Alpha Commanders, and Bile Spewers generally require at least two headshots—even at close range—because of their health distribution and durable body-part values.
Against Automatons, the Slugger can kill Devastators with accurate headshots. More importantly, it gives you enough stagger and loaded ammunition to fight several Devastators or Berserkers without requiring every shot to be perfect.
Against Illuminate Overseers, direct headshots can produce one-shot kills. However, grounded Overseers generally will not be staggered through intact ablative armor plates. You must either hit the exposed head or destroy a plate and then strike the flesh beneath it.
That is an important distinction. The weapon still has 30 stagger force, but the armor system can prevent that stagger from being applied until the correct body part is exposed.
The Slugger also benefits substantially from first-person aiming.
Its third-person reticle can bounce or shift enough to cause shots to miss even when the weapon appears to be aligned. The weapon can also fire again before the reticle has completely settled.
For the best results:
- Use first-person aiming for precision shots.
- Pace your fire instead of shooting at the maximum possible rate.
- Fire, stagger, move, and fire again.
- Use body shots when the situation is too chaotic for perfect headshots.
- Take advantage of the 16-round tube to maintain pressure while moving through the fight.
The Slugger is not trying to replace a marksman rifle. It is designed to let you enter close range, hunt elite enemies, and beat the brakes off them while staggering anything that survives.
SG-20 Halt

Primary role: Crowd Control
Secondary role: Situational Chaff Killer
Best range: Approximately 10–30 meters with stun ammunition; closer with flechettes
The SG-20 Halt is built around its dual-ammunition system.
Its main attraction is not raw damage. It is the ability to fire stun rounds that disable enemies for approximately five full seconds.
That is an enormous amount of time during a chaotic fight.
Only a small number of stun pellets need to connect, depending on the target’s size. As a result, the Halt can reliably stun many enemies from approximately 25–30 meters with one or two shots.
That gives it several powerful applications:
- Stop an elite enemy before it reaches the team.
- Interrupt several enemies approaching through a chokepoint.
- Disable a target before switching to a support weapon.
- Protect an ally who is being surrounded.
- Create time to reload, reposition, heal, or deploy a stratagem.
The stun ammunition also deals relatively little friendly-fire damage. Shooting toward an endangered teammate may apply some chip damage or briefly stun them, but that is frequently preferable to allowing them to be overwhelmed.
The flechette ammunition is much less impressive.
It has medium armor penetration and applies approximately 20 stagger force, but its wide spread makes it unreliable when focusing on smaller humanoid weak points.
Against Terminids, flechettes are most useful inside approximately 10–15 meters. Larger bug bodies catch more of the spread, and missed flechettes may still strike surrounding enemies because of the faction’s swarm density.
However, the ammunition has several limitations:
- Flechettes become weak and inconsistent against Warriors beyond approximately 10–15 meters.
- Hive Guards and Brood Commanders should generally be engaged inside 10–15 meters.
- The 20 stagger force is not enough to stagger Alpha Commanders, which require at least 25.
- Smaller targets such as Hunters may slip between the spread or receive insufficient damage at range.
Against Automatons, stunning Berserkers and Devastators before switching weapons is generally more effective than attempting to kill them with flechettes alone.
Against the Illuminate, the stun rounds are excellent against Overseers and Appropriators at approximately 25–30 meters. Flechettes can kill Voteless and may perform well when the swarm is tightly funneled, but the Halt is not the best weapon for independently managing a massive Voteless horde.
The Halt is strongest when treated as a control-and-combo weapon.
Stun the threat. Then finish it with a secondary weapon, support weapon, grenade, stratagem, teammate, or well-placed flechette burst at close range.
SG-451 Cookout

Primary role: Crowd Control
Secondary roles: Chaff Killer and Elite Killer
Best range: Approximately 10–25 meters
The Cookout initially appears difficult to categorize.
It can kill chaff. It can kill elite enemies. It deals fire damage. It also has the same 35 stagger force as the standard Punisher.
However, the interaction between stagger and fire damage makes Crowd Control its most important role.
The Cookout deals approximately 240 direct ballistic damage across 20 pellets. Enemies struck by the weapon may also ignite and receive approximately 100 fire damage per second for three seconds, producing up to 300 damage from a complete burn application.
The fire damage applies to the enemy’s main health pool rather than being restricted to the specific body part struck.
Against smaller enemies, this means a single shot can:
- Stagger the target.
- Ignite it.
- Allow the burn to finish the kill.
- Free you to immediately engage another target.
You do not need to continue firing at an enemy that is already guaranteed to die.
That changes the Cookout’s rhythm compared with the Punisher.
The Punisher relies more heavily on immediately killing targets with direct ballistic damage. The Cookout allows you to stagger and ignite one portion of a group, switch to another portion, and let the damage-over-time effect continue working between shots.
Against elite enemies, the same principle applies over multiple burn applications.
The Cookout may kill more slowly than weapons designed around immediate burst damage. However, its stagger allows you to juggle multiple enemies while fire continues draining their main health pools.
You can shoot an Overseer, stagger it, move behind cover, engage another target, and return when another burn application is necessary. The same approach works against Devastators, Berserkers, Brood Commanders, and other enemies that the weapon can damage.
The Cookout rewards players who understand positioning.
Do not stand still and repeatedly dump shells into one burning target. Apply the stagger and ignition, then use the time you created.
You can:
- Change targets.
- Create distance.
- Move behind cover.
- Protect an ally.
- Reload individual shells.
- Allow the burn to complete the kill.
Once you understand that rhythm, the Cookout becomes one of the most efficient and interesting Crowd-Control shotguns in the game.
SG-97 Sweeper

Primary role: Elite Killer
Secondary role: Limited Crowd Control
Best range: Approximately 10–25 meters
The SG-97 Sweeper is a medium-penetration, slam-fire shotgun with a seven-round capacity and 70 spare shells, producing a full combat load of 77 rounds.
When it released, it was frequently declared an automatic top-tier weapon. Its damage and medium armor penetration are undeniably powerful, but those strengths come with meaningful limitations.
The Sweeper is designed to rapidly burst down elite enemies.
Its slam-fire mechanism allows you to hold the trigger and fire successive shots as quickly as the action can cycle. Against targets such as Berserkers, Devastators, Overseers, Hive Guards, and Alpha Commanders, this allows you to deliver a large amount of medium-penetration damage in a short period.
Its preferred combat pattern is:
- Identify two or three dangerous enemies.
- Rapidly burst them down.
- Reposition.
- Reload.
- Repeat.
The Sweeper applies approximately 20 stagger force with its projectiles. That is enough to stagger enemies around the size of a Hive Guard or smaller, but not enough to stagger many major elite threats.
Berserkers, Devastators, and Alpha Commanders will continue attacking and advancing while you shoot them.
That makes the Sweeper more dangerous to use at extreme close range than the traditional Punisher shotguns. You do not have enough stagger to automatically create space, and the seven-round tube disappears quickly under slam fire.
Its round-by-round reload is also slower than the reload used by the Punisher and Slugger. Although its firing speed and loaded damage look excellent on paper, its sustained performance drops once repeated reload cycles are considered.
The Sweeper’s bayonet applies approximately 25 stagger force, allowing it to stagger Warriors, Hive Guards, and even up to an Alpha Commander. However, this should be considered a fallback option to create space rather than a main engagement tool because close range against Terminids is a high risk situation.
A full choke can produce surprisingly accurate shots at longer distances, including occasional long-range headshot kills. However, those shots are generally poor uses of ammunition. The weapon is still most efficient when firing concentrated bursts inside 25 meters.
The Sweeper has enough total ammunition to appear suitable for general-purpose use, but trying to kill every chaff enemy with it will drain that supply rapidly.
A supply backpack, personal access to resupply pods, or frequent visits to points of interest can compensate for the problem. However, those resources can make almost any ammunition-hungry weapon appear more sustainable.
At its baseline, the Sweeper is not a limitless jack-of-all-trades weapon. It is an aggressive, hit-and-run Elite Killer.
DBS-2 Double Freedom
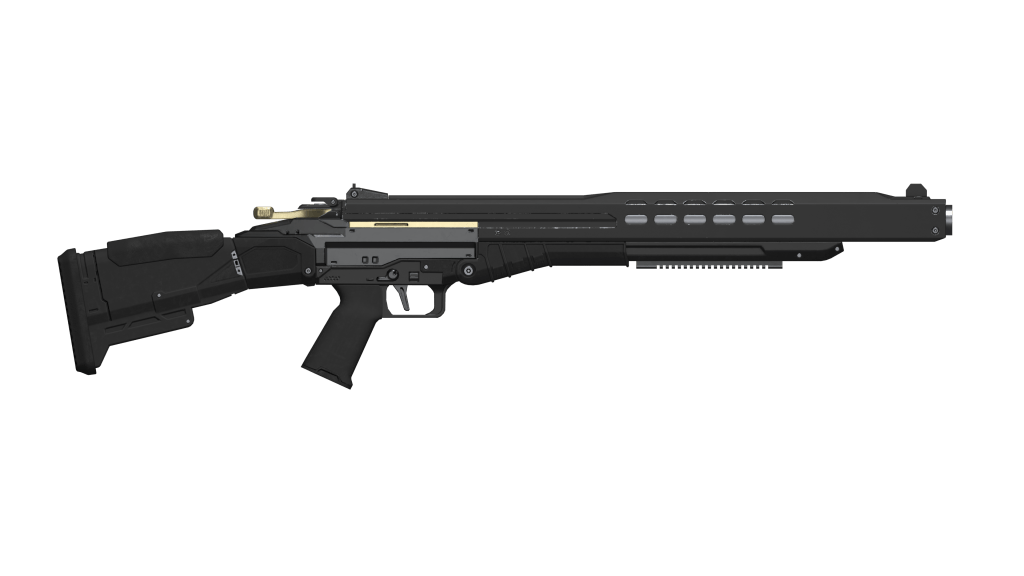
Primary role: Elite Killer
Secondary role: Emergency Crowd Control
Best range: Approximately 5–12 meters
The DBS-2 Double Freedom is another hybrid shotgun, but its damage delivery is almost the opposite of the Sweeper.
The Sweeper distributes several powerful shots across multiple targets. The Double Freedom asks you to select one enemy and press the delete button.
It is a medium-penetration, break-action shotgun capable of firing both barrels in an extremely powerful burst. Inside approximately 10–12 meters, that burst can obliterate light- and medium-armored elites.
Alpha Commanders become bug paste. Devastators become scrap. Overseers become squid guts.
Its raw burst output also gives it approximately the same broad damage-per-second neighborhood as the Sweeper, with the Double Freedom delivering a much more front-loaded attack.
However, the weapon’s two-shot capacity and long reload cycle severely limit its sustainability.
Although each shot applies heavy stagger, that does not make the Double Freedom a dedicated Crowd-Control weapon. Crowd Control is about reliably restricting multiple enemies and maintaining control over a fight. The Double Freedom fires one devastating volley and then requires a lengthy reload.
It can interrupt an emergency threat, but it cannot continuously juggle a group the way a Punisher or Cookout can.
It is also a poor Chaff Killer. Spending one of only two shells on a minor enemy is usually a terrible trade, especially when large groups are approaching.
The Double Freedom works best when your remaining equipment can handle routine enemies. Bring it when you want your primary weapon to function as a close-range execution tool against elite targets.
M90A Shotgun
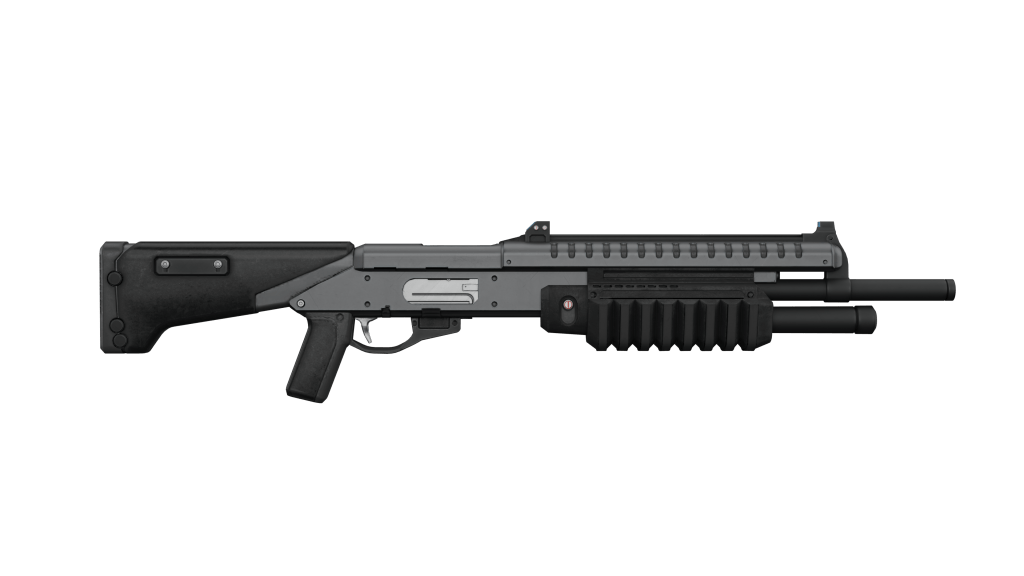
Primary role: Elite Killer
Secondary roles: Chaff Killer and Crowd Control
Best range: Approximately 5–25 meters
The M90A from the Halo crossover is sometimes dismissed as an upgraded Punisher that still fails to receive medium armor penetration.
That interpretation misses how its damage profile differs from the Punisher.
The M90A deals approximately:
- 50% more normal damage per shot than the Punisher
- 100% more durable damage than the Punisher
In other words, it deals roughly twice as much durable damage.
That makes it significantly more front-loaded and much better suited to bursting down chunky light-armored enemies or striking exposed weak points on medium-armored enemies.
The Punisher and M90A have roughly comparable total damage across their full combat loads. They also share the same maximum stagger force and use similar round-by-round tube reload systems.
The difference is how that damage is distributed.
The Punisher receives more shells and is better suited to repeatedly killing chaff. The M90A carries fewer, more powerful shots and is better suited to rapidly killing elites.
Against chaff, the M90A certainly works. However, spending its high-damage shells on small enemies can quickly destroy its ammo economy.
Against elite targets, the M90A can outperform the Punisher consistently because it delivers more damage and substantially more durable damage with every trigger pull.
The weapon becomes especially deadly inside approximately five meters, where a complete pellet spread can connect with the target. Some players dislike needing to close that distance for maximum damage, but the behavior is faithful to the original Halo shotgun.
On higher difficulties in the early Halo games, players also frequently needed to close to approximately five meters to secure reliable one-shot kills against Covenant Elites.
The M90A maintains the Punisher family’s mobile brawling style:
- Fire.
- Stagger.
- Move.
- Reload individual shells.
- Fire again.
It is also more forgiving than the Slugger because its pellet spread does not require the same single-projectile precision.
The M90A may be the best overall jack-of-all-trades option for players who want the feel of a classic shotgun. It retains strong stagger, powerful close-range damage, a practical round-by-round reload, and enough flexibility to engage both chaff and elites.
Its primary role is still Elite Killer because that is where its front-loaded damage profile provides the most value.
It also has one quality-of-life advantage that deserves special recognition: a flashlight.
The M90A is currently the only full-sized Punisher-style shotgun with one. Night missions and dark city environments can become difficult to navigate, especially on consoles with HDR displays.
Arrowhead, please add flashlights to the other pump-action shotguns.
SG-225 Breaker

Primary role: Elite Killer
Secondary role: Chaff Killer
Crowd Control: Minimal
Best range: Approximately 5–20 meters
The standard SG-225 Breaker is a light-penetration shotgun built around damage per second.
It has less total damage across its combat load than the other Breaker variants, but it delivers its damage more rapidly. That gives it the most front-loaded damage profile and the highest burst damage of the Breaker family.
The weapon is best used to focus down elite enemies that are:
- Unarmored
- Light armored
- Medium armored with exposed weak points
Select one dangerous target, unload enough rounds to kill it, and then immediately move to the next.
The Breaker applies approximately 15 stagger force, which is only enough to affect relatively small enemies. It cannot rely on stagger to stop major threats from attacking.
Your defense is your damage output.
Kill the enemy before it reaches you, then reposition before the magazine runs dry.
The Breaker family also possesses an unusual penetration slowdown penalty. Most conventional projectiles receive approximately a 25% slowdown after penetrating a target. Breaker projectiles receive approximately an 80% slowdown.
This severely reduces their ability to pass through one enemy and continue dealing meaningful damage to another. Many players may not know that standard projectile type weapons can overpenetrate through unarmored targets or sections and damage targets behind them. This only applies to unarmored targets and things like stagger force carry through, but not status effects like incendiary, stun, and so on.
Although a Breaker’s pellet spread can strike several enemies, the weapon is still fundamentally encouraged to focus its damage on whatever is directly in front of it.
That is another reason the standard Breaker works better as an Elite Killer than as a dedicated anti-swarm weapon.
It can kill chaff, particularly when enemies are tightly funneled, but it lacks the ammunition reserves and broad damage profile of the Spray & Pray. It also lacks the burn propagation of the Breaker Incendiary.
The standard Breaker is the member of the family you choose when you want immediate burst damage against a limited number of priority targets.
SG-225SP Breaker Spray & Pray
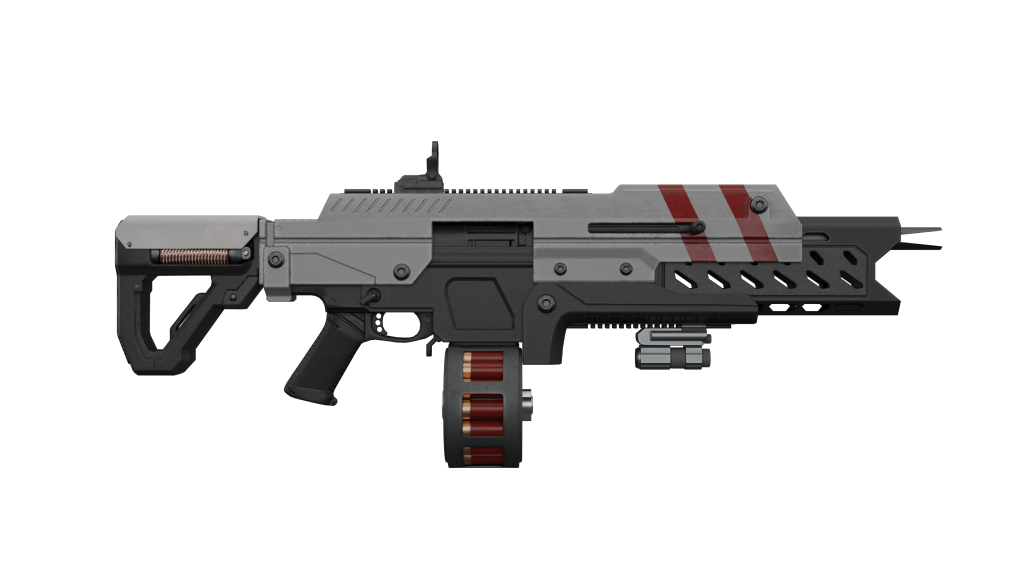
Primary role: Chaff Killer
Secondary role: Limited Elite Killer
Crowd Control: Very low
Best range: Approximately 10–25 meters
The SG-225SP Breaker Spray & Pray shifts the Breaker platform away from burst damage and toward sustained anti-chaff fire.
It has lower damage per second than the standard Breaker, but it carries a larger ammunition supply and produces more total damage across its complete combat load.
That makes it better suited to repeatedly firing into large groups of smaller enemies.
Its default configuration reinforces that role:
- Large drum magazine
- High-volume fire
- Duckbill muzzle attachment
- Broad horizontal spread
- Large total ammunition reserve
The Spray & Pray applies only approximately three stagger force. That is essentially negligible against anything beyond the weakest enemies.
You should not expect it to stop an advancing elite. Its role is to continuously damage and eliminate chaff before they can close the distance.
It performs particularly well against:
- Terminid swarms
- Automaton Troopers
- Illuminate Voteless
The weapon can still damage larger targets with exposed light armor, but that is not where its damage profile provides the best return.
Use it to sweep across broad sections of a swarm, maintain pressure, and allow the rest of your loadout to handle elite and heavy enemies.
SG-225IE Breaker Incendiary
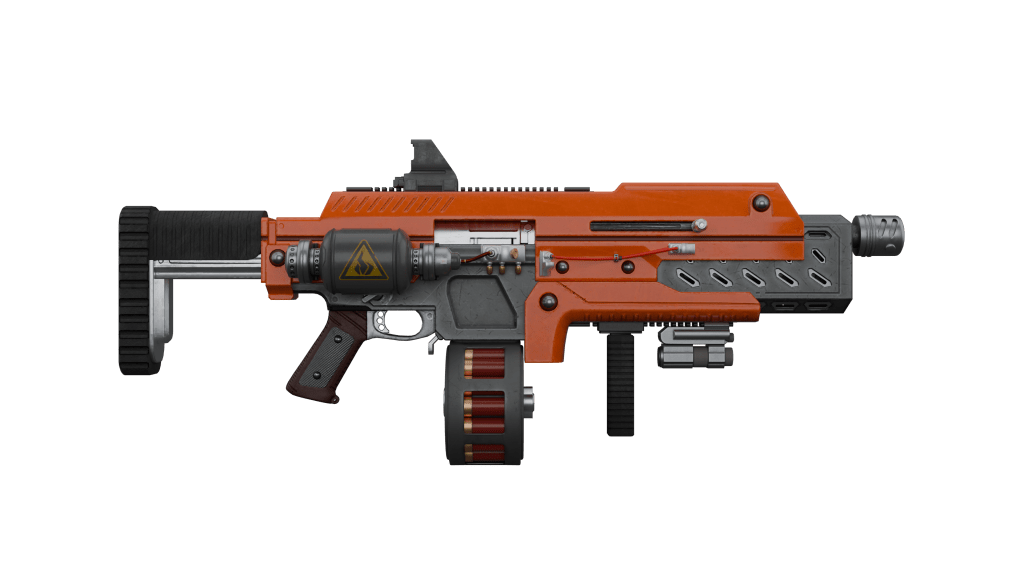
Primary role: Chaff Killer
Secondary role: Limited Elite Killer
Crowd Control: Very low
Best range: Approximately 15–25 meters
The SG-225IE Breaker Incendiary is the dedicated fire-based Chaff Killer of the conventional shotgun category.
It can be understood as the Chaff Killer counterpart to the Cookout.
The Cookout combines fire with heavy stagger and is therefore better suited to controlling dangerous targets. The Breaker Incendiary trades most of that stagger for greater area saturation and a larger volume of fire.
Its three-round burst and drum magazine encourage a specific rhythm:
- Fire one burst into one section of a swarm.
- Shift to another section.
- Fire another burst.
- Allow the burning enemies to die over the next several seconds.
You do not need to repeatedly shoot every enemy that has already been ignited.
The goal is to spread fire across as many targets as possible while maintaining enough distance for the damage-over-time effect to finish its work.
Approximately 15–25 meters is the weapon’s ideal engagement area.
At closer distances, its lack of stagger becomes dangerous. Burning enemies can continue advancing and attacking until the damage finally kills them.
Beyond 25 meters, its relatively slow projectiles, drag, drop, and spread make consistent ignition less predictable.
It is also important to understand how its projectiles behave after impact.
Breaker projectiles have poor penetration performance after striking their first target, and fire ignition only applies to the first enemy struck. A projectile that passes through one enemy will not continue igniting everything behind it.
You therefore want to spread separate pellets and bursts across the visible front of the swarm rather than depending on penetration.
The Breaker Incendiary is especially effective in a coordinated team. It can saturate large groups of chaff while teammates focus on elites, heavy enemies, and objectives.
Energy-Based Shotguns
The following weapons are like shotguns mainly in appearance and somewhat in their basic mechanical behavior, but are categorized as energy weapons in the armory for good reason.
They deserve full consideration during an energy-weapon breakdown, but their primary shotgun-style roles can still be summarized here.
SG-8P Punisher Plasma
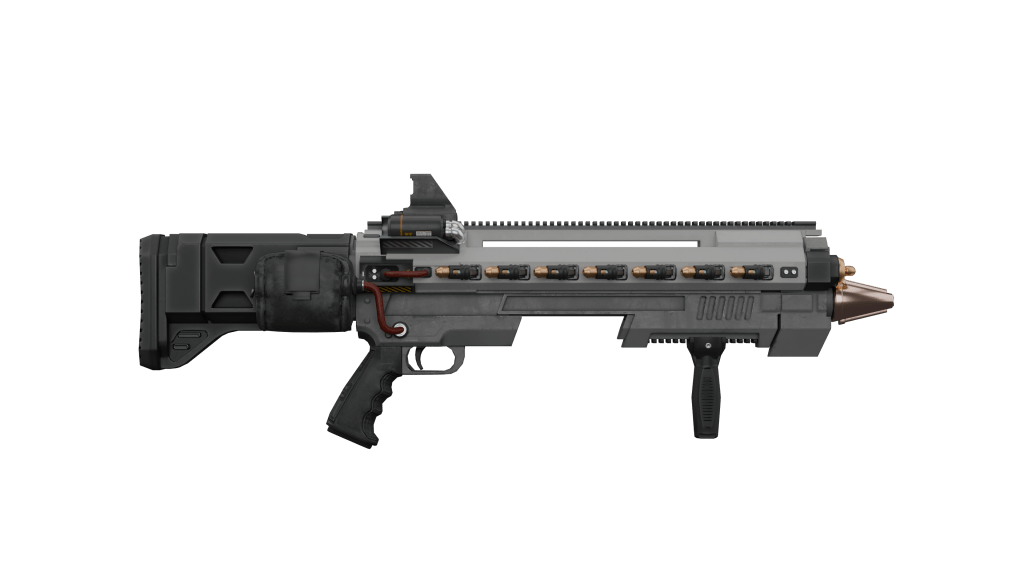
Primary role: Crowd Control
Secondary roles: Chaff Killer and Elite Killer
Utility: Limited stealth misdirection
Best range: Short-to-mid range
The Punisher Plasma fires a lobbed plasma projectile with an explosion radius of approximately three meters, and uses a Punisher-style pump-action shot cycle, but with a cartridge reload instead of a round reload, so be careful not to waste ammo.
Despite being a shotgun in appearance and pump-action behavior, it functions most similarly to a grenade launcher with the plasma explosion and projectile arc. Think of it as the little brother to the stratagem GL-21 Grenade Launcher.
Its biggest advantage is the ability to stagger several enemies with one shot, including groups beyond the normal 25-meter shotgun range.
The explosion will often kill clustered chaff immediately. Elite enemies usually require several shots, but each impact can continue restricting their movement while damaging the entire group.
The projectile’s explosion can also be used as a distraction or misdirection tool while maintaining stealth. Firing away from your position may draw enemy attention toward the impact.
That provides a small but legitimate Utility role in addition to the weapon’s primary Crowd-Control function.
ARC-12 Blitzer
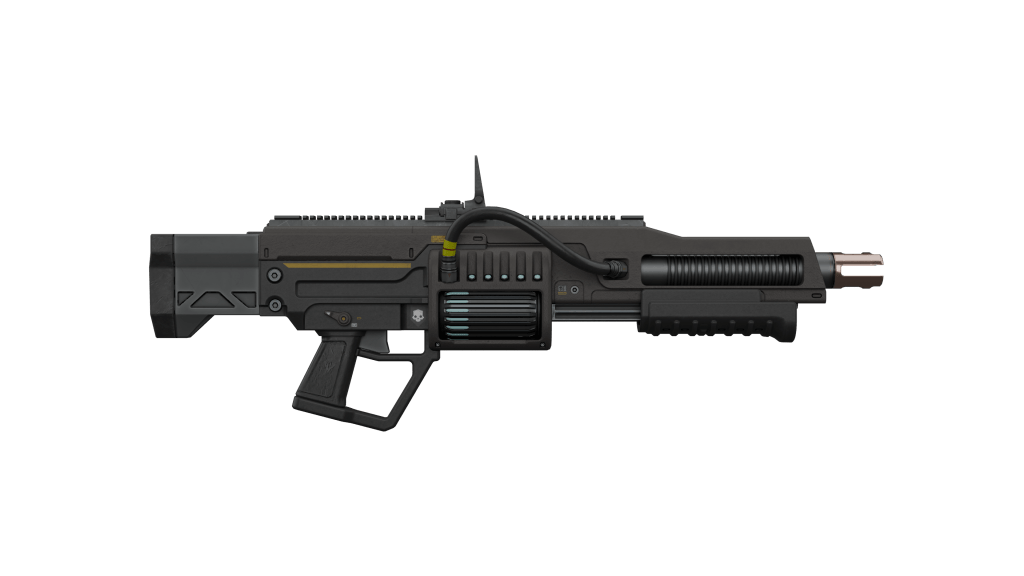
Primary role: Crowd Control
Secondary roles: Chaff Killer and Elite Killer
Best range: Within approximately 25 meters
The ARC-12 Blitzer fires medium-penetration electrical arcs that can blast through multiple unarmored targets, if they are in a line, or it can split the arcs to simultaneously hit up to 5 targets.
It also features truly infinite ammo, but with a very slow fire rate of 45 RPM.
Its combination of armor penetration, arc behavior, and stagger makes it a natural Crowd-Control weapon. It can attack a front target while simultaneously affecting enemies positioned behind it.
The main limitation is target acquisition.
Terrain, debris, vegetation, enemy bodies, and other obstructions can interfere with the arcs. As corpses accumulate, the weapon may have increasing difficulty selecting and chaining to the intended targets.
When the environment cooperates, the Blitzer can repeatedly control groups without relying on conventional ammunition.
LAS-13 Trident
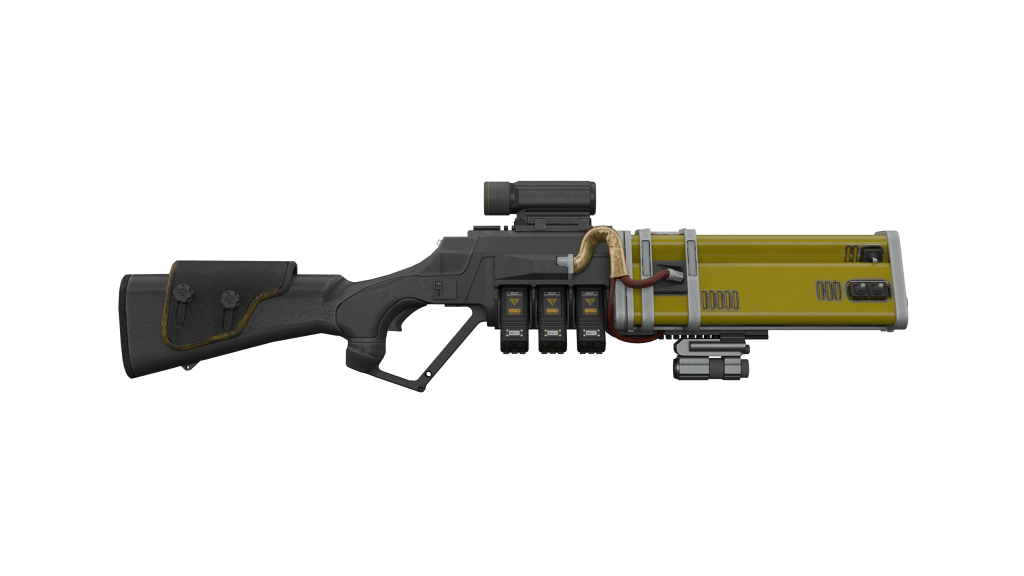
Primary role: Chaff Killer
Crowd Control: Minimal
Utility: None beyond heat-based ammunition economy
Best range: Close-to-short range
The LAS-13 Trident fires six laser beams and uses a heat sink rather than conventional ammunition.
Proper heat management gives it potentially unlimited ammunition, making it well suited to continuously firing into smaller enemies.
However, the beams have substantial positional variability. They do not always converge directly on the intended point, making the weapon unreliable when attempting to burst down small elite weak points.
It also provides practically no stagger or other Crowd Control.
Its strengths are sustained fire, ammunition independence, and repeated chaff removal.
Final Thoughts
Shotguns in Helldivers 2 are not interchangeable weapons that can be accurately arranged from best to worst on one universal ladder.
They deliver their damage differently, rely on different engagement distances, and solve different combat problems.
The Punisher provides sustainable chaff removal and heavy stagger. The Slugger hunts elites through precision and medium penetration. The Halt creates five-second windows of control. The Cookout juggles enemies while fire continues working between shots.
The Sweeper delivers sustained medium-penetration bursts. The Double Freedom compresses enormous damage into one target. The M90A combines classic shotgun handling with a front-loaded Elite Killer damage profile.
The standard Breaker prioritizes immediate damage per second. The Spray & Pray sacrifices burst damage for anti-chaff volume. The Breaker Incendiary spreads lethal fire across entire swarms.
Even the energy-based shotguns occupy distinct roles through plasma explosions, electrical chaining, and heat-based laser fire.
The best shotgun is not necessarily the weapon with the largest damage number or the fastest theoretical kill time.
The best shotgun is the one that performs the job your complete loadout needs it to perform.
Consider what enemies your support weapon handles, what your secondary weapon can cover, whether your stratagems are designed for swarms or heavy targets, and how much Crowd Control your team already possesses.
Understand the role. Build around the tradeoffs. Then choose the weapon that produces the most effective—and most enjoyable—version of your preferred playstyle.
Fun first. Meta second.
Weapon images sourced from https://helldivers.wiki.gg/.
 Radekin Gaming
Leave a comment