- Core Theme
- Loadout Overview
- Weapon Routes
- Throwable
- Stratagem Loadout
- Booster
- Stratagem Unlock Rules
- General Version
- Survival Horror Increased Difficulty Variant
- Universal Restrictions
- Ping and Minimap Restrictions
- Recommended Playstyle
- Quick Rules Summary
- Final Thoughts
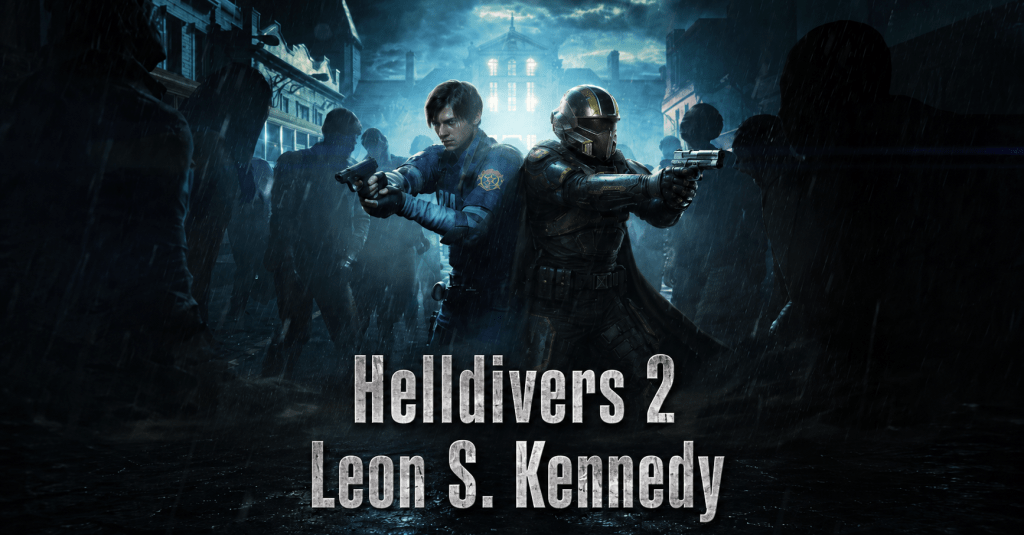
This Helldivers 2 Resident Evil 2 Leon S. Kennedy Challenge Mode is built around turning a normal mission into a slower, more deliberate survival horror experience.
The goal is not to play the most optimized version of Helldivers 2. The goal is to recreate the feeling of playing as Leon S. Kennedy in Resident Evil 2, starting with limited tools, scavenging to survive, and gradually unlocking stronger equipment as the mission escalates.
This challenge is especially designed for zombie-style missions and survival horror roleplay, where the player has limited access to Super Destroyer support and must rely more heavily on weapons, positioning, scavenging, and careful movement.
Core Theme
This is a Resident Evil 2-inspired zombie survival rule set.
The main themes are:
- Limited starting equipment
- Scavenging during the mission
- Restricted stratagem access
- Objective-based equipment progression
- Reduced minimap reliance
- Survival horror pacing
- Escalating firepower as the mission progresses
You are not supposed to feel like a fully equipped Helldiver with unlimited support options. You are supposed to feel like Leon Kennedy trying to survive the outbreak, find supplies, complete objectives, and escape alive.
Loadout Overview
Armor
The ideal armor choice is:
BP-20 Correct Officer
Medium armor with Ballistic Padding
This is the best thematic fit for Leon’s police officer identity.
If you do not have the BP-20 Correct Officer armor, use:
B-01 Tactical
Medium armor with Extra Padding
The B-01 Tactical keeps the challenge accessible because it is the default starting armor.
Weapon Routes
The player must choose one of the following weapon routes.
Route 1: Shotgun Route
For the shotgun route, the player may bring either:
M90A Shotgun
or
SG-8 Punisher Shotgun
Both are acceptable.
The SG-8 Punisher is included because it is available in the base game, making this version more accessible to all players.
The M90A Shotgun from the Halo Legendary Warbond is also acceptable and thematically appropriate.
If the player chooses either shotgun, the required secondary weapon is:
P-2 Peacemaker
This route represents a more traditional Resident Evil 2 Leon setup, pairing a shotgun with a basic sidearm.
SG-8 Punisher Customization
If using the SG-8 Punisher shotgun, weapon customization is up to the player.
Any optic choice is acceptable.
However, the iron sight is the closest match to the Resident Evil 2 shotgun.
Any muzzle configuration is also acceptable.
For theme matching:
No muzzle attachment most closely resembles the starting shotgun in Resident Evil 2.
Full or Half choke most closely resembles the fully upgraded shotgun in Resident Evil 2.
The SG-8 Punisher is flexible. Players may customize it however they prefer, but for the closest Resident Evil 2 feel:
- Use iron sights
- Use no muzzle attachment for the starting shotgun feel
- Use full or half choke for the fully upgraded shotgun feel
Route 2: Matilda Route
For the Matilda route, the player uses:
SMG-37 Defender
This is used to simulate Leon’s fully upgraded Matilda pistol from Resident Evil 2.
Recommended configuration:
- Holographic sight is closest match, also matches RE Requiem version
- Compensator to match the RE2 upgrade
- Short magazine to better simulate the Resident Evil 2 version mag size
- Laser pointer plus flashlight to match RE2 flashlight
- Fire in three-round bursts like RE2 Matilda
The underbarrel laser pointer plus flashlight is used to represent Leon’s flashlight setup.
Resident Evil 2 does not give the Matilda a laser sight, but Leon does use a flashlight. In Helldivers 2, this is the closest available adaptation.
If the player chooses the SMG-37 Defender, the secondary weapon must be either:
P-113 Verdict
or
P-4 Senator
The P-113 Verdict better resembles Leon’s Desert Eagle-style handgun visually.
The P-4 Senator better matches the high-damage profile. It also fits if you are adapting Leon across the wider Resident Evil style, since his newer revolver, the Requiem and other magnums in the series, closely resembles the Senator.
Throwable
Use the:
G-12 High Explosive Grenade
While Resident Evil 2 includes different grenade types, the G-12 High Explosive is the simplest and most broadly accessible composite version of Leon’s grenade options.
Stratagem Loadout
The approved stratagems are:
- SAH-20 Ballistic Shield Backpack
- FLAM-40 Flamethrower
- MLS-4X Commando
- Orbital Napalm Barrage
No other non-mission-essential stratagems are allowed.
SAH-20 Ballistic Shield Backpack
The SAH-20 Ballistic Shield Backpack represents boarding up windows in the Resident Evil 2 remake, or activating shutters in the original game, to prevent zombies from getting into the building.
It is not a perfect one-to-one mechanical match, but thematically it fills the same role: creating a defensive barrier between Leon and the horde.
FLAM-40 Flamethrower
The FLAM-40 Flamethrower represents the chemical flamethrower Leon gains access to when entering the Umbrella facility in Resident Evil 2.
This is part of the mid-to-late mission escalation. You do not start with it freely available. You have to earn it through objective progress.
MLS-4X Commando
The MLS-4X Commando represents the rocket launcher Leon gets access to during the final boss fight against the Super Tyrant.
This is a late-mission power spike and should only become available after the final primary objective has been completed.
Orbital Napalm Barrage
The Orbital Napalm Barrage represents the Umbrella facility beginning to blow up during the climactic ending events of Resident Evil 2.
This is the final escalation tool and may only be used once extraction has been activated.
Booster
The preferred booster is:
Experimental Infusion
This represents combining red, blue, and green herbs in Resident Evil 2, which fully restores health and briefly improves damage resistance.
If the player does not own Experimental Infusion, the next best option is:
Vitality Enhancement
Stratagem Unlock Rules
Stratagem access is restricted and tied to mission progression.
This is one of the most important parts of the challenge. The player does not get full access to every tool at the start of the mission. Equipment unlocks gradually as objectives are completed.
Ballistic Shield Unlock
The SAH-20 Ballistic Shield Backpack may only be called in after completing any side objective.
Once a side objective has been completed, the shield becomes available according to whichever version of the rules you are playing.
Flamethrower Unlock
The FLAM-40 Flamethrower may only be called in after meeting the correct mission-type requirement.
For missions with only a few major objectives, such as colony missions where the objectives are things like raising the flag or destroying the monolith, completing one main objective unlocks the flamethrower.
For missions with multiple sub-objectives followed by a final primary objective, the player must complete all sub-objectives before calling in the flamethrower.
This keeps the flamethrower positioned as a mid-mission or late-mission escalation tool rather than something you can rely on immediately.
Commando Unlock
The MLS-4X Commando may only be called in after successfully completing the final primary objective.
This represents Leon gaining access to the rocket launcher for the final stretch of the game.
Orbital Napalm Barrage Unlock
The Orbital Napalm Barrage may only be called in once extraction has been activated.
This represents the final collapse of the facility and the desperate last push to escape.
General Version
In the general, less restrictive version of this challenge mode, each approved stratagem may be called in normally after its initial unlock requirement has been met.
Once unlocked, the stratagem remains available for the rest of the mission.
For example, after completing a side objective, the player may call in the Ballistic Shield Backpack whenever needed.
After unlocking the flamethrower, the player may continue calling it in as needed for the rest of the mission.
The same logic applies to the Commando and Orbital Napalm Barrage after their respective unlock conditions are met.
This version is better for players who want the Resident Evil theme and progression structure without making the challenge too restrictive.
Survival Horror Increased Difficulty Variant
In the stricter survival horror version, stratagem use is more limited.
Each stratagem may only be called in according to the number of qualifying objectives or unlock conditions completed.
The goal is to make every stratagem call feel like a scarce Resident Evil resource rather than a normal Helldivers 2 cooldown.
Ballistic Shield Example
The Ballistic Shield Backpack may only be called in once for each completed side objective.
If a mission has only one side objective, the player may only call in one Ballistic Shield Backpack for the entire mission.
If a mission has two or three side objectives, the player may call in the Ballistic Shield Backpack once per side objective completed.
Other Stratagems
The same limited-use logic applies to the other approved stratagems.
After the flamethrower, Commando, or Orbital Napalm Barrage has been unlocked, it is still treated as a limited-use survival tool rather than a freely reusable support option.
This version is better for players who want the full survival horror feel, where every support call matters and wasting equipment can seriously hurt your chances of survival.
Universal Restrictions
These rules apply to both versions of the challenge mode.
No other stratagems may be used except for mission-essential items such as:
- SSSDs
- Hellbombs
- Other required objective tools
Reinforcements may only be called in at a POI.
The player should rely on scavenging, careful movement, limited resources, and mission progression to survive.
Ping and Minimap Restrictions
Players may freely use the ping system to highlight enemies, ammo, supplies, objectives, and other useful information during the mission.
However, use of the minimap is restricted.
The minimap may be used to place map marker pins for route navigation, but it may not be used to constantly scan the area for topography indicators, points of interest, or enemy positions.
To preserve the survival horror aspect of not knowing where threats are located, players should avoid opening the minimap as much as possible.
LIDAR Station Exception
If a LIDAR station has been activated, players may use the minimap to place map marker pins at the location of any POI they want to visit.
This represents the player earning better situational awareness through mission progress instead of freely relying on the map from the beginning.
Reinforcement Exception
If reinforcements need to be called in, players may open the minimap to place a map marker on a previously discovered POI so the reinforcement call can be made there.
Outside of route marking, LIDAR-based POI marking, and reinforcement-related POI marking, minimap use should be avoided.
Recommended Playstyle
This challenge works best when played slower than a normal Helldivers 2 mission.
You should not be sprinting around the map while constantly checking the minimap and calling in stratagems on cooldown.
Instead, treat the mission like a survival horror scenario:
- Move carefully
- Scavenge supplies
- Conserve ammunition
- Avoid unnecessary fights
- Use pings instead of constant map scanning
- Earn your stronger tools through objective progress
- Treat each stratagem call like a major resource decision
- Prioritize survival and extraction over perfect efficiency
The more you lean into the restrictions, the more the mode starts to feel like a Resident Evil-style mission inside Helldivers 2.
Quick Rules Summary
Starting Loadout
Armor:
BP-20 Correct Officer preferred
B-01 Tactical allowed as accessible fallback
Weapon Route 1:
M90A Shotgun or SG-8 Punisher
Secondary must be P-2 Peacemaker
Weapon Route 2:
SMG-37 Defender configured as the upgraded Matilda
Secondary must be P-113 Verdict or P-4 Senator
Throwable:
G-12 High Explosive Grenade
Booster:
Experimental Infusion preferred
Vitality Enhancement allowed as fallback
Stratagems:
SAH-20 Ballistic Shield Backpack
FLAM-40 Flamethrower
MLS-4X Commando
Orbital Napalm Barrage
Unlock Progression
Ballistic Shield:
Unlocked after completing any side objective.
Flamethrower:
Unlocked after completing one main objective on simpler mission structures, or all sub-objectives on missions with multiple sub-objectives before the final primary objective.
Commando:
Unlocked after completing the final primary objective.
Orbital Napalm Barrage:
Unlocked once extraction has been activated.
Universal Rules
No other non-essential stratagems.
Mission-essential items are allowed.
Reinforcements may only be called in at a POI.
Pings are freely allowed.
Minimap use is restricted to route marking, LIDAR-based POI marking, and reinforcement-related POI marking.
Scavenging is encouraged.
Final Thoughts
The Resident Evil 2 Leon S. Kennedy Challenge Mode is meant to turn a normal Helldivers 2 mission into a slower, more deliberate survival horror experience.
The goal is not to play perfectly optimized Helldivers. The goal is to recreate the feeling of starting with limited tools, scavenging to survive, and gradually earning access to stronger equipment as the mission escalates.
Play smart, conserve resources, avoid relying on the minimap, and treat every stratagem unlock like a major survival milestone.
I’m a huge zombie survival fan across games, shows, and movies, so this Helldivers 2 rule set is something I’ve put a lot of time into and genuinely love playing, whether solo or with teammates.
Have you tried any custom survival horror rule sets like this, or does this give you any ideas for your own themed challenge runs?
Let me know your thoughts, questions, and ideas in the comments below.
Radekin


Leave a comment